
Tessellations - How I create them
(updated on December 13, 2025)
I have been asked many times how I create tessellations, so I try to keep one blog post as up-to-date as possible. I hope you find this post helpful.
Step 1: Create a shape that tessellates
There are many ways to find this shape, including manually, but here are some of my favorite tools:
TILED.ART: you just need a browser for this one. You start with the type of symmetry you want and just play!

Select the symmetry you want
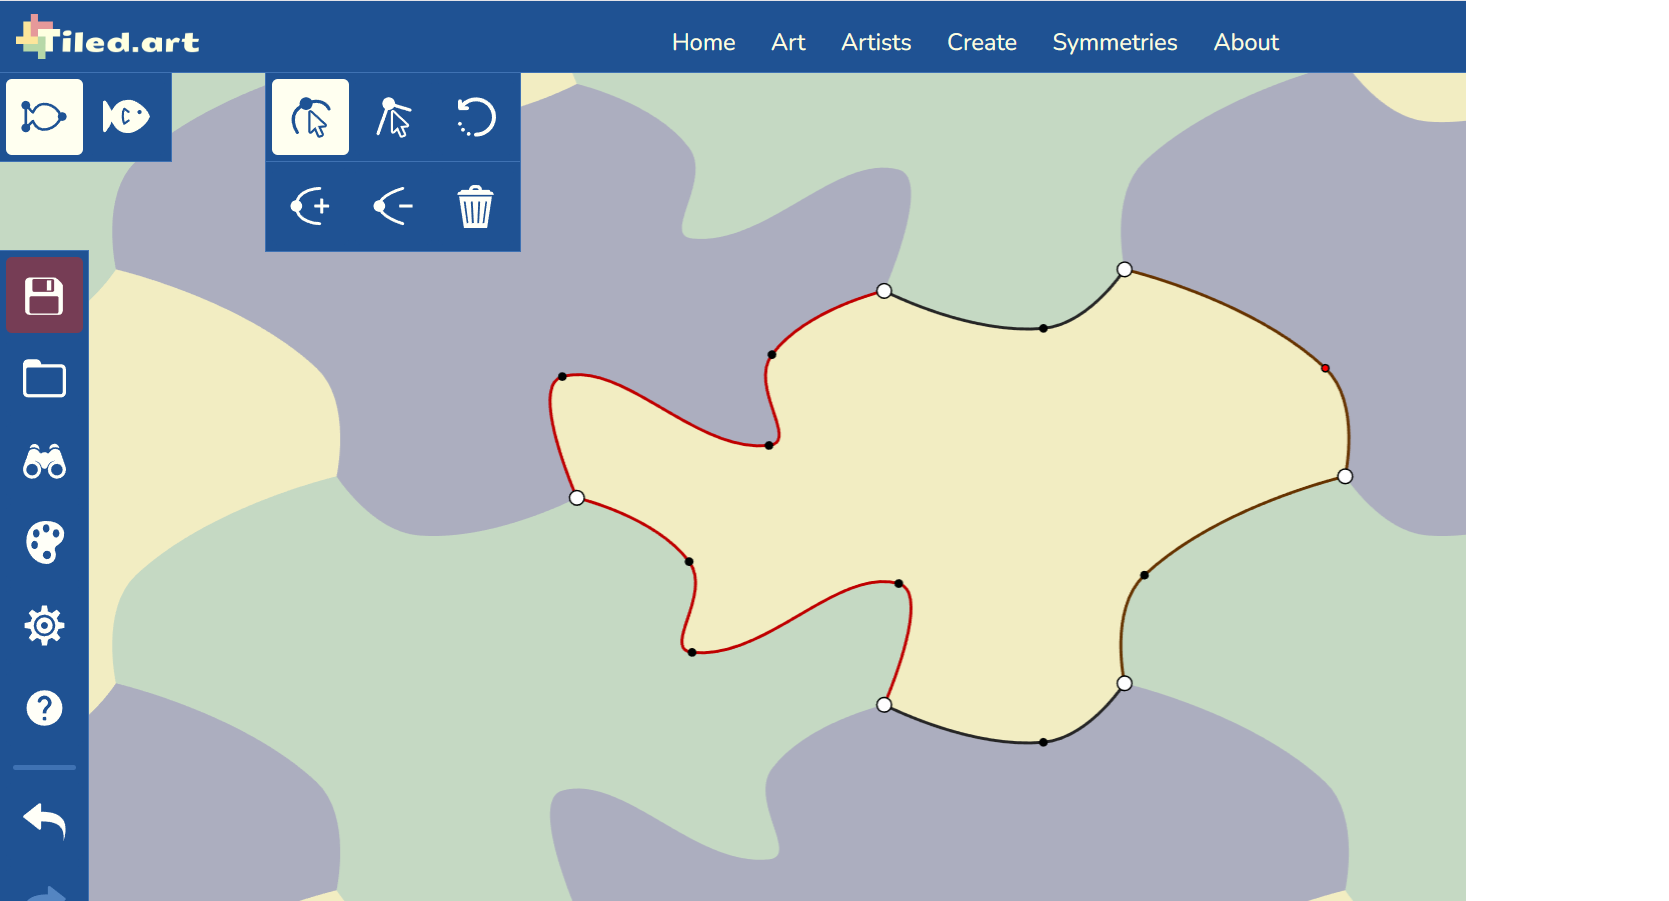
Add points to the lines and pull… it starts to take shape.
Note: there are apps I love to use which are not specifically for tessellations. Some of them are iOrnament, KaleidoPaint, and Amaziograph.
Step 2: Keep manipulating the shape until you see something you like
Think of it like seeing images and shapes in the clouds; once you have it, stop. You may want to add just a couple of details so you don’t forget what you saw.
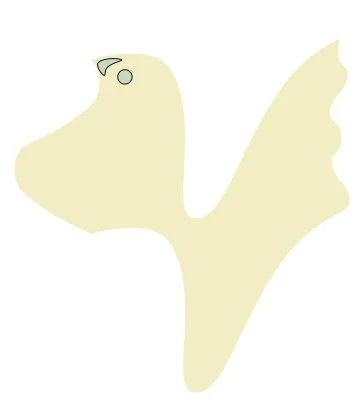
Like adding a circle for the eye and a triangle-like shape for the beak of this bird
Step 3: Save the Tessellation
I would suggest saving both the tessellation and the shape itself so if you get confused later on how they fit into each other you can look at the pattern.
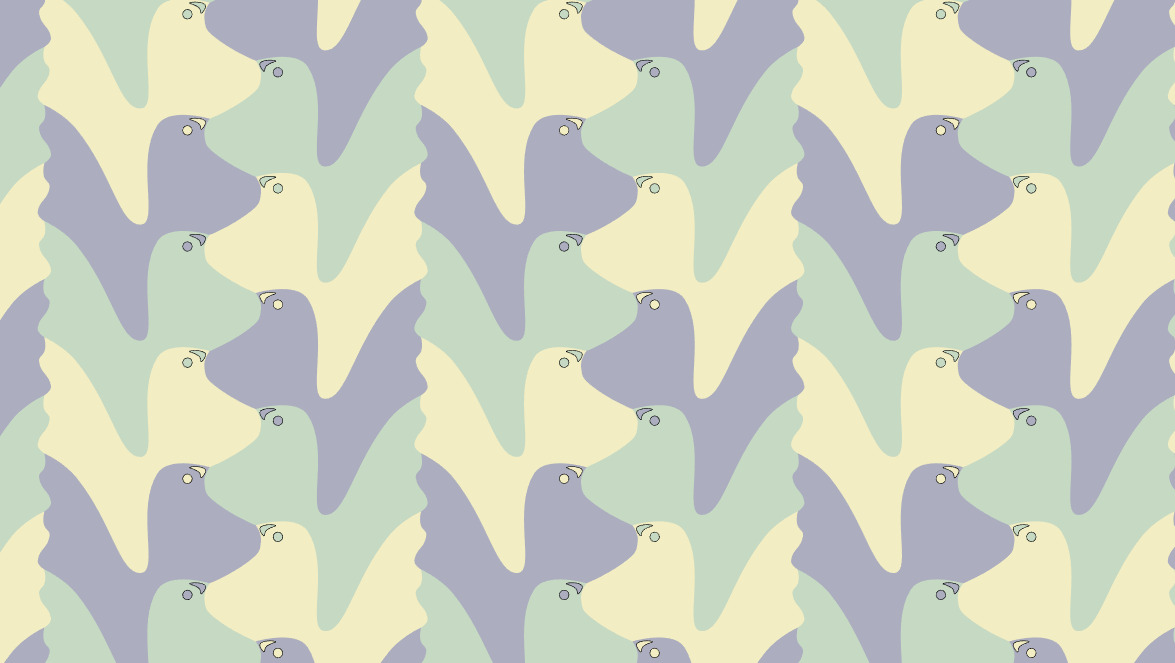
On TILED.ART you can save the tessellation pattern and the shape:
If you are working with iOrnament or one of the other apps, I would suggest saving the shape as a tile. You can then put a couple of the tiles together to extract your shape.

The saved tile is on the left, and my extracted shape on the right.
Step 4: Print the shape
You need to be careful when printing since you want to make sure the shape does not get skewed. If the shape gets a bit skewed, it will not tessellate (ask me how I know!).
If you carve stamps like I do, it is at this point that I decide on the size of the stamp based on the carving complexity or the surface I want to cover with it. The point is that if you make it too large, you may only be able to print it a few times before your paper is full. By the same token, if you make it too small, it may take you quite a while to cover the surface you usually print it on.
Step 5: Draw inside your tessellating shape
Using tracing paper, go over the outline of the shape. You want to be as accurate as possible with this step so the shapes will fit perfectly in the end. Come back and trace over the printed shape every time you need a new shape for drawing. I often make several drawings before I am happy with it.
Step 6: Design the inside of your shape
This is what is going to make your tessellation completely unique. Use your imagination and creativity and have fun with it! Sometimes I draw it once and I’m done, but more often than not, I will repeat steps 5 and 6 over and over until I’m happy.
If you feel uninspired, you can always use the shape as a continuous pattern. See below how I used the same shape for a bird and a doodle pattern.

Step 7: Transfer the completed design to the carving material
I just turn the tracing paper over the carving material and rub with my finger or with a bone folder.
Step 8: Carve the block / stamp
I always start with the edges, as that is the most important part of the carving for a tessellation. If I mess up, there is no point in going further - it will not tessellate. So I try to do the edges as slowly and accurately as possible.
Step 9: Print your awesome tessellation
You can always refer back to your full pattern if you have trouble seeing how the pieces fit together. To me, this is the most fun step of the whole process: it is like magic when you first see it come together. ENJOY!!
You can also take a look at the process on my About page where I go through some of these steps with images. Please let me know if something is not clear and I will try to respond or update the posting.